When you create a new product or website, you may need to connect your database with other platforms through an API. It is not an easy task, at least because there is more than one way to do it, and each one has its own specs.
Not everyone can afford to waste their time for searching the best solution. Effebot can help: our experts prepared a simple step-by-step guide which will allow you to pass the integration process quickly and painlessly.
API integration with Google sheets might be used for two cases:

Case 1 Scan QR-code through WhatsApp on your mobile. It is the same process you are carrying when you need to connect WhatsApp WEB via a link.
Case 2 You need to provide access to other integrations via Google sheets that client already has.
What information can be settled:
phone number of the call receiver
actions that were made in Effebot (press 1, 2, etc.)
After integration, information from mailing (phone number and IVR) will be automatically transferred to the Google sheets: column A is the button a client pressed and column B is a client phone number.
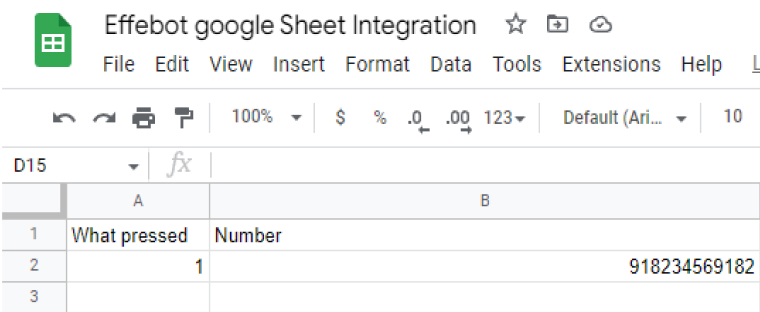
1. Create a Google table, name it and fill the first row.
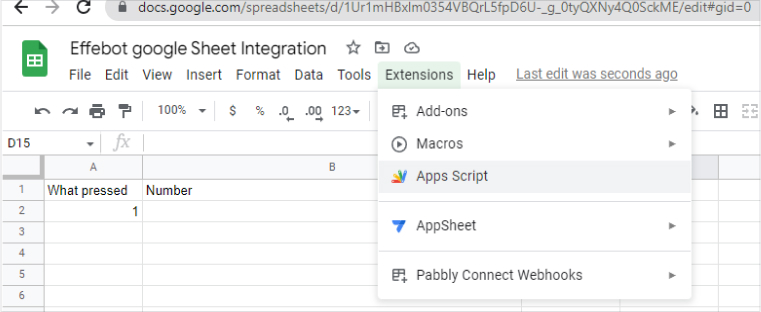
2. Go to the extensions and choose the Apps script.
3 Past these code:
// Required function for publishing Google script app
// This funciton fires when a GET message is recieved
function doGet(e) {
return HtmlService.createHtmlOutput(
"doGet request");
}
function flattenObject(obj) {
const flattened = {}
Object.keys(obj).forEach((key) => {
const value = obj[key]
if (typeof value === 'object' &&
value !== null && !Array.isArray(
value)) {
Object.assign(flattened,
flattenObject(value))
} else {
flattened[key] = value
}
}) return flattened
}
// Required fucntion for publishing Google script app
// This fucntion fires when a POST message is recieved
function doPost(e) { //Name of Sheet to be used.
var sheetName = "Sheet1";
try { // convert payload into js object
// webhook events are only for one document so we can just extract the first array object
var data = JSON.parse(e.postData.contents);
var sheet = SpreadsheetApp.getActiveSpreadsheet()
.getSheetByName(sheetName); // write some data to Google sheet. There is other data that can be used but these are common data point for every document
// sheet.appendRow([data.id, data.name]);
sheet.appendRow(Object.values(
flattenObject(data)));
} catch (error) { // if something goes wrong we will append message to google sheet so it can be easily found
var sheet = SpreadsheetApp.getActiveSpreadsheet()
.getSheetByName(sheetName);
sheet.appendRow([error])
}
return HtmlService.createHtmlOutput(
"doPost received");
}
It must look exactly the same as on this screenshot:
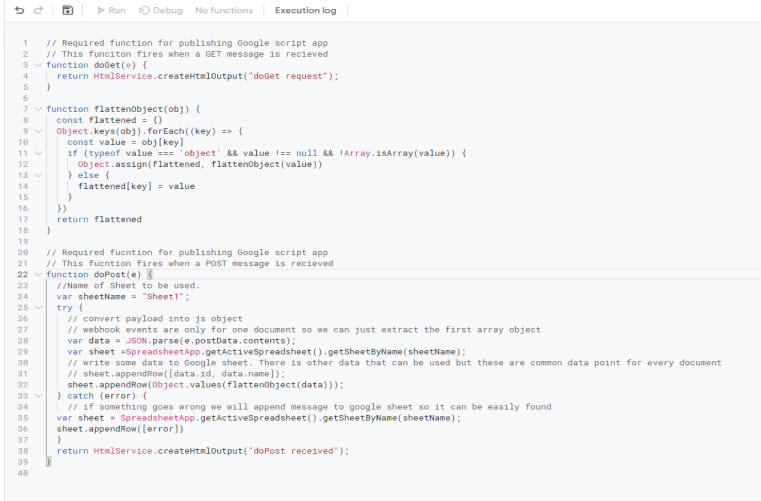
4 Save this code. If everything is fine, the yellow circle will disappear.

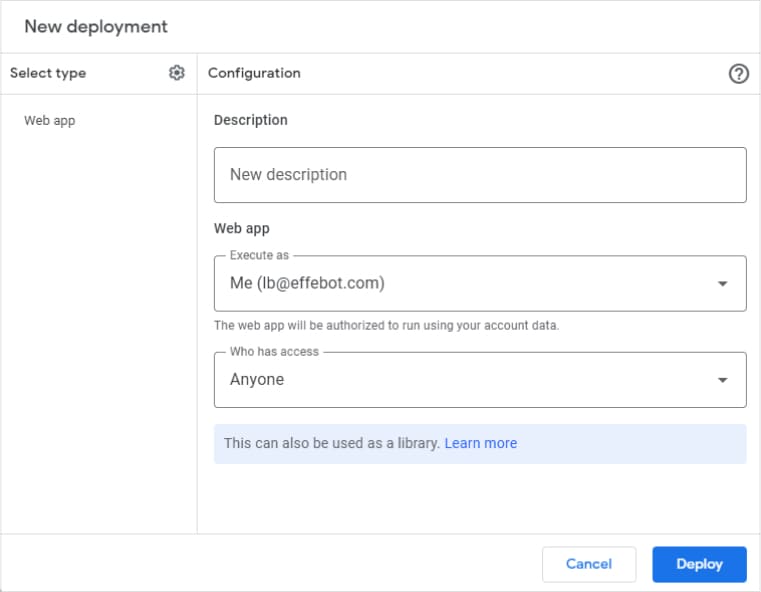
5 At the top right click “Deploy” and then “New deployment”.
In the appeared window select the deployment type “Web Application”. In this window you have to choose your own account and give access to everyone.
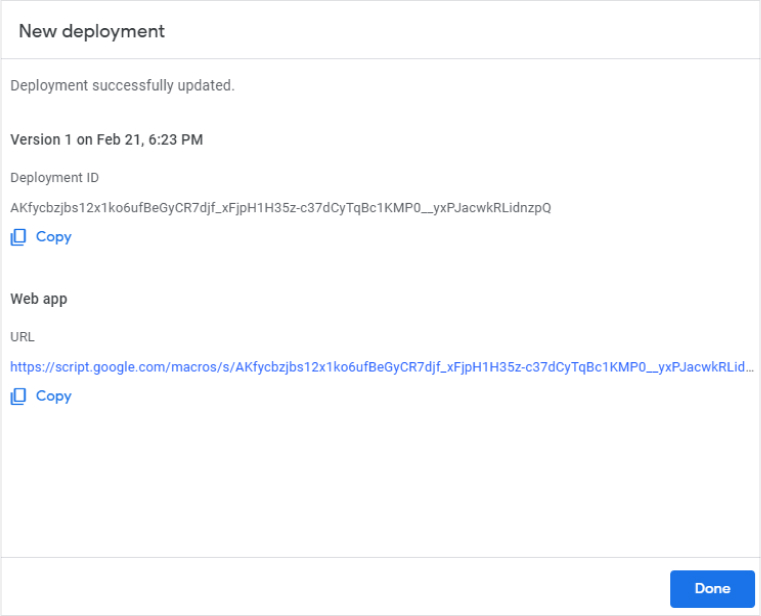
6 Now you can start your deployment. After that, some windows may open, in each of them we provide access. When setup is done, you will receive your URL.
You can find them in “Start deployment — manage deployments”.
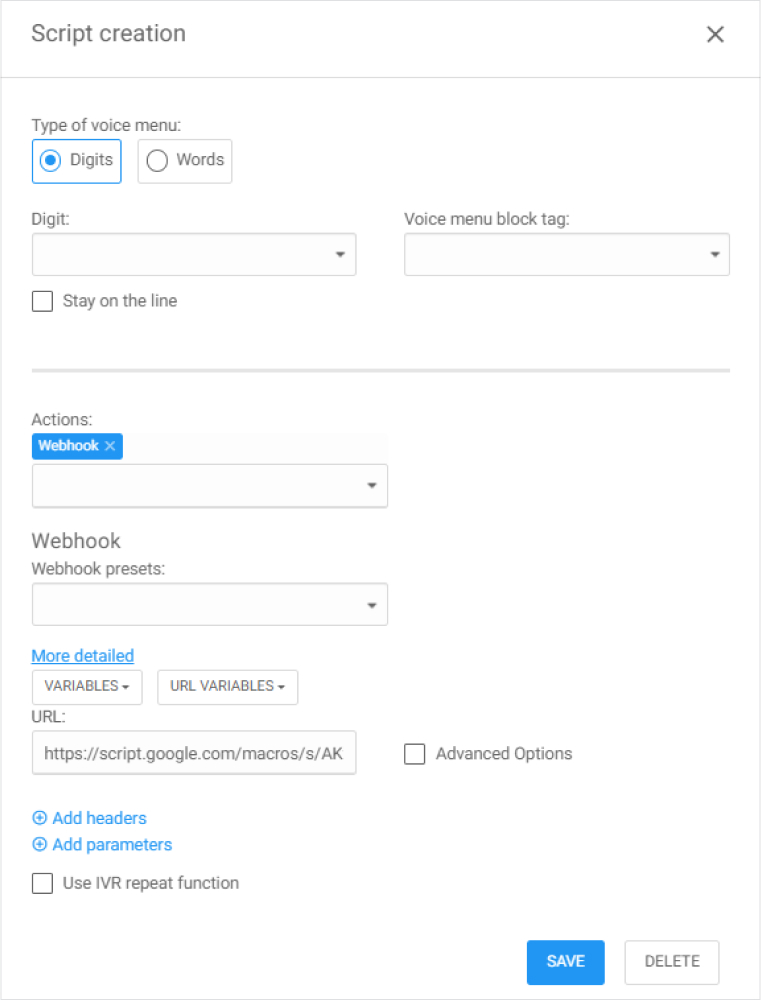
7 Return to your Effebot account and create a webhook preset. Paste the URL which you got in Google sheets.
Fill the key and value like on the screenshot below. After that you can start mailing.
USA Effebot
India Effebot

Hong Kong Effebot


Copyright © 2024 NETVANA TELESMS PRIVATE LIMITED. All rights reserved.
User agreement↗ GDPR privacy notice↗ Cookie policy↗ Delete my account↗